
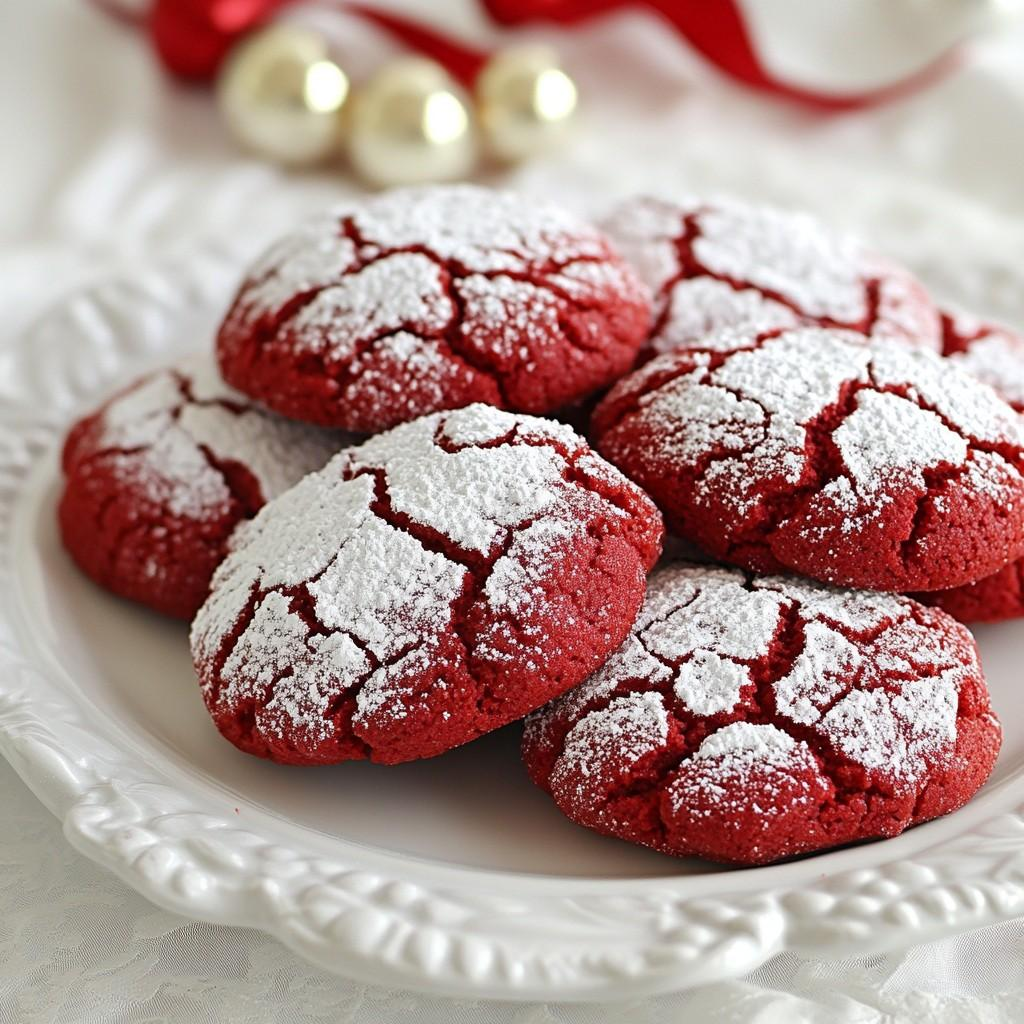
Red velvet Christmas cookies bring the familiar flavor of red velvet cake into an easy, hand-held treat. They have a gentle cocoa flavor, a soft cookie center, and creamy white chocolate chips in every bite. Their bright red color makes them especially pretty for Christmas dessert tables, cookie exchanges, and edible gifts.
Red velvet should taste balanced rather than like a plain chocolate cookie with food coloring. This recipe uses a modest amount of cocoa, vanilla, and a little tang from cream cheese in the optional drizzle. Chilling the dough helps control spreading and gives the color time to settle into an even shade.
What Makes These Cookies Red Velvet?
Red velvet is known for a mild cocoa flavor, vanilla notes, and a distinctive red color. The cocoa should support the flavor without overpowering it. A small amount of gel food coloring gives a more concentrated color than liquid coloring, so you can use less added moisture in the dough.
Ingredients You’ll Need
- All-purpose flour: Gives the cookies structure. Measure carefully to avoid a dry dough.
- Unsweetened cocoa powder: Use natural unsweetened cocoa for a familiar red velvet profile. A small amount is enough.
- Unsalted butter: Softened butter creams with the sugars and helps create a tender cookie.
- Brown sugar: Adds moisture and chewiness.
- Granulated sugar: Balances the brown sugar and helps the edges set.
- Egg: Binds the dough.
- Vanilla extract: Adds the classic red velvet aroma.
- Red gel food coloring: Gives strong color without thinning the dough as much as liquid coloring. Add gradually because brands vary in strength.
- Baking soda and baking powder: Help the cookies rise and spread evenly.
- Salt: Balances sweetness.
- White chocolate chips: Add creamy sweetness and a festive contrast.
How to Make Red Velvet Christmas Cookies
1. Prepare the oven and pans
Line two baking sheets with parchment paper. Heat the oven to 350°F (175°C) when the dough is ready to bake.
2. Whisk the dry ingredients
In a medium bowl, whisk the flour, cocoa powder, baking soda, baking powder, and salt. Whisk thoroughly so the cocoa and leaveners are evenly distributed.
3. Cream the butter and sugars
In a large bowl, beat the softened butter with the brown and granulated sugars for 2–3 minutes, until creamy. Scrape the bowl as needed.
4. Add egg, vanilla, and coloring
Beat in the egg and vanilla. Add red gel coloring a little at a time until the mixture is a vivid red. Remember that the color may deepen slightly as the dough rests and bakes. Avoid adding a large amount of liquid coloring, which can change the dough consistency.
5. Combine the dough
Add the dry ingredients and mix on low speed just until a soft dough forms. Fold in the white chocolate chips, reserving a small handful for the tops if desired. Do not continue mixing once the flour is incorporated.
6. Chill the dough
Cover and refrigerate for 30–45 minutes. This makes the dough easier to scoop and helps reduce excessive spreading. If the dough is already firm and easy to portion, it is ready.
7. Scoop and bake
Heat the oven to 350°F (175°C). Scoop about 1½ tablespoons of dough per cookie and place on the prepared sheets, leaving about 2 inches between them. Bake for 10–12 minutes, until the edges look set and the centers are slightly soft. Avoid waiting for the tops to become dry.
8. Cool and decorate
Let the cookies rest on the pan for 5 minutes. Press reserved white chocolate chips onto the warm tops if desired, then transfer to a rack. Cool completely before adding an optional cream cheese drizzle.
Optional Cream Cheese Drizzle
For a red velvet cake-inspired finish, beat 2 ounces softened cream cheese with ½ cup powdered sugar, ½ teaspoon vanilla, and 1–2 teaspoons milk until smooth and thick enough to drizzle. Add the milk gradually. Drizzle over completely cooled cookies and allow it to set before stacking. Cookies with cream cheese drizzle should be refrigerated if they will be kept for more than a short serving period.
Tips for the Best Red Velvet Cookies
- Choose gel coloring. It provides strong color without adding as much liquid. Start with a small amount and build up.
- Keep the cocoa modest. Too much cocoa can make the cookies darker and shift the flavor away from classic red velvet.
- Chill before baking. This helps control spread and makes portioning cleaner.
- Don’t overbake. Remove the cookies when the edges are set but the centers remain soft.
- Use parchment, not a hot tray. Let baking sheets cool between batches so the next tray does not spread prematurely.
Variations
- Red velvet sandwich cookies: Sandwich two completely cooled cookies with a thin layer of cream cheese frosting. Refrigerate after filling.
- White chocolate drizzle: Melt white chocolate gently and drizzle over cooled cookies.
- Holiday sprinkle cookies: Add red, white, or green sprinkles to the tops before baking.
- Chocolate chip version: Replace half the white chocolate chips with semisweet chocolate chips.
Storage and Freezing
Store plain, cooled cookies in an airtight container at room temperature for up to 4 days. If decorated with a cream cheese drizzle or filled with cream cheese frosting, refrigerate in a covered container and bring to a cool room temperature before serving.
Freeze undecorated baked cookies in a freezer-safe container for up to 2 months for best quality. Thaw at room temperature. Dough balls can also be frozen; bake from frozen and add a little time, checking for set edges and soft centers.
Frequently Asked Questions
Can I use liquid red food coloring?
Yes, but gel coloring is more concentrated and adds less liquid. If using liquid coloring, add it gradually and avoid using so much that the dough becomes loose.
Why are my red velvet cookies brown?
Too much cocoa, a weak food coloring, or a small amount of coloring can make the finished cookies look brownish. Use a modest amount of cocoa and a concentrated red gel color.
Do these cookies taste like chocolate?
They have a mild cocoa flavor rather than the deep intensity of a chocolate cookie. Vanilla and white chocolate help create the familiar red velvet balance.
Can I make the dough the night before?
Yes. Cover and refrigerate overnight. If it becomes very firm, let it stand briefly until it can be scooped without becoming warm.
Recipe Card
Red Velvet Christmas Cookies
Prep: 15 minutes, plus 30–45 minutes chilling
Bake: 10–12 minutes per batch
Total: About 1 hour 15 minutes
Yield: About 22–24 cookies
Ingredients
- 2¼ cups (270 g) all-purpose flour
- 2 tablespoons (10–12 g) unsweetened cocoa powder
- ½ teaspoon baking soda
- ½ teaspoon baking powder
- ½ teaspoon fine salt
- ¾ cup (170 g) unsalted butter, softened
- ¾ cup (150 g) packed light brown sugar
- ½ cup (100 g) granulated sugar
- 1 large egg
- 2 teaspoons vanilla extract
- Red gel food coloring, as needed
- 1 cup (170 g) white chocolate chips
Instructions
- Whisk flour, cocoa, baking soda, baking powder, and salt.
- Beat butter and both sugars until creamy.
- Beat in egg and vanilla, then add red gel coloring gradually.
- Mix in dry ingredients just until combined.
- Fold in white chocolate chips. Cover and chill 30–45 minutes.
- Heat oven to 350°F (175°C). Scoop 1½-tablespoon portions onto parchment-lined sheets, spacing 2 inches apart.
- Bake 10–12 minutes, until edges are set and centers are soft.
- Cool 5 minutes on the pan, then transfer to a rack.
Allergen note: These cookies contain wheat, milk, and egg. Check food-coloring and chocolate labels for additional ingredient or allergen information.
Food-safety note: Do not taste raw cookie dough. Raw flour and eggs can carry harmful germs. Wash hands and equipment after handling raw dough.
Recipe research note: The mild-cocoa profile, coloring approach, and white-chocolate pairing are informed by established red velvet cookie methods, including BBC Good Food’s red velvet cookies. This recipe’s ingredient quantities and method are an original adaptation for a soft Christmas cookie.
Leave a Reply