Classic Chicken Pot Pie: The Ultimate Comfort Food
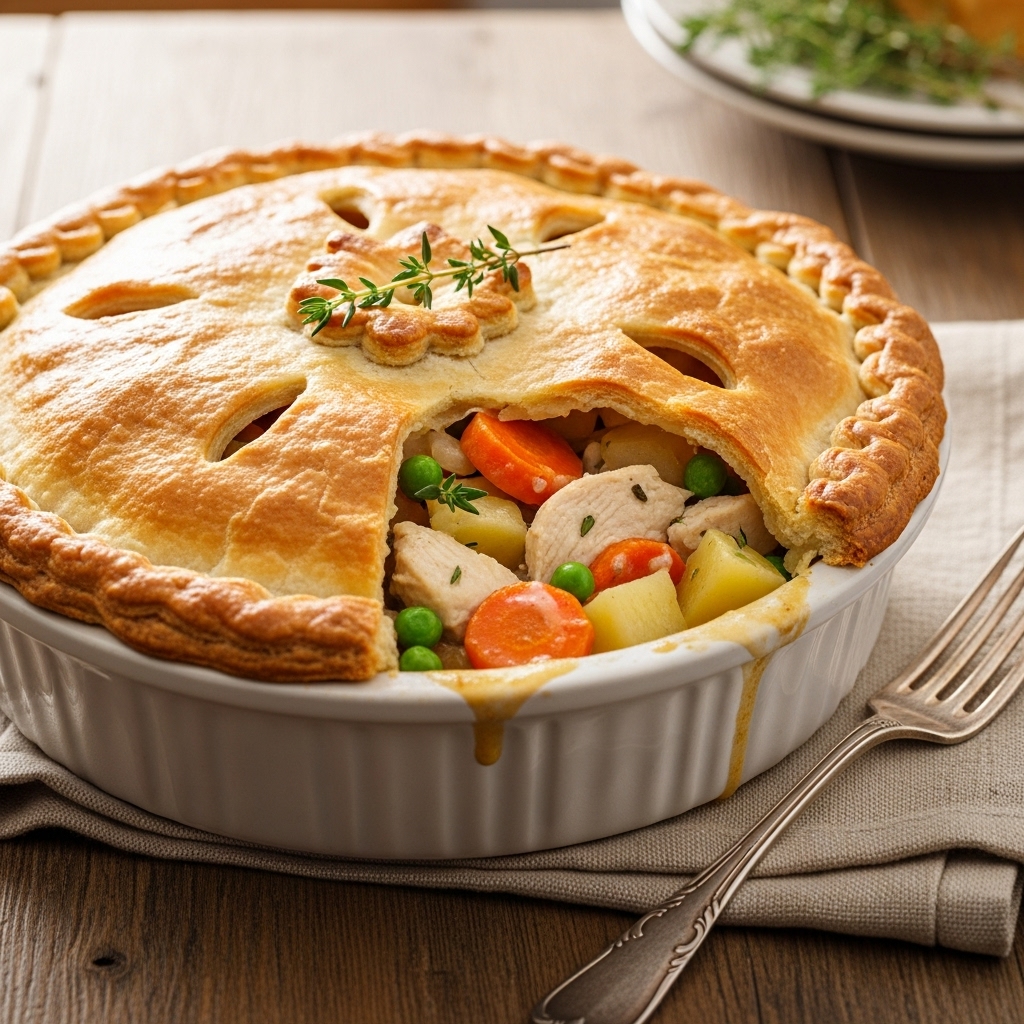
There’s something deeply comforting about a golden-crusted chicken pot pie fresh from the oven – the flaky pastry giving way to a creamy, savory filling packed with tender chicken and vegetables. This Classic Chicken Pot Pie recipe is pure comfort food magic, the kind of dish that warms you from the inside out and makes any day feel special. It’s home cooking at its absolute finest!
What makes this pot pie truly special is the perfect balance of textures and flavors: buttery, flaky crust that shatters at the first bite, a rich and velvety sauce that’s not too thick or too thin, tender pieces of chicken, and a medley of vegetables that add color, nutrition, and texture. It’s the dish that grandmothers have been making for generations, and once you master it, you’ll understand why it’s remained a beloved classic.
This recipe has become a go-to for family dinners, potluck gatherings, and those days when you need something that feels like a warm hug. It’s impressive enough for company but comforting enough for a quiet night at home. Let’s create some cozy, delicious memories together!
Recipe Overview
Description: Tender chicken and vegetables in a creamy, herb-infused sauce, all encased in a buttery, flaky pie crust – baked to golden perfection.
Difficulty Level: Intermediate (Absolutely worth the effort!)
Prep Time: 30 minutes
Cook Time: 45-50 minutes
Total Time: 1 hour 20 minutes
Serving Size: 6-8 generous portions
Ingredients List
For the Filling:
- 3 cups cooked chicken, diced or shredded (about 1.5 lbs)
- 3 tablespoons butter
- 1 medium onion, diced
- 3 cloves garlic, minced
- 2 medium carrots, diced (about 1 cup)
- 2 celery stalks, diced (about ¾ cup)
- 1 cup frozen peas
- 1 cup frozen corn (optional)
- 8 oz mushrooms, sliced (optional but delicious)
- ⅓ cup all-purpose flour
- 2 cups chicken broth (low-sodium preferred)
- 1 cup whole milk or heavy cream
- 1 teaspoon dried thyme
- 1 teaspoon dried sage
- ½ teaspoon dried rosemary, crushed
- 1 teaspoon salt (adjust to taste)
- ½ teaspoon black pepper
- ¼ teaspoon nutmeg (secret ingredient!)
For the Crust:
- 2 store-bought pie crusts (9-inch)
- OR homemade pie dough (recipe below)
- 1 egg, beaten with 1 tablespoon water (egg wash)
Homemade Pie Crust (Optional):
- 2½ cups all-purpose flour
- 1 teaspoon salt
- 1 tablespoon sugar
- 1 cup (2 sticks) cold unsalted butter, cubed
- 6-8 tablespoons ice water
Quick Shortcuts:
- Rotisserie chicken: Pre-cooked and saves time
- Store-bought crust: No shame in convenience!
- Frozen mixed vegetables: Use 3 cups frozen veggie blend
- Leftover turkey: Perfect for Thanksgiving leftovers
Dietary Modifications:
- Gluten-free: Use GF flour and GF pie crust
- Dairy-free: Use coconut milk and dairy-free butter
- Lower calorie: Use milk instead of cream, less butter
- Extra veggies: Add green beans, potatoes, or parsnips
Step-by-Step Instructions
Preparing the Filling:
- Cook the chicken (15 minutes if needed): If starting with raw chicken, poach breasts in boiling water for 15-20 minutes until cooked through. Cool and dice. Time-saver: Use rotisserie chicken or leftover cooked chicken!
- Sauté the aromatics (5 minutes): In a large pot or Dutch oven, melt butter over medium heat. Add diced onion and cook for 3-4 minutes until translucent. Add garlic and cook 1 minute until fragrant. Flavor foundation: Don’t rush this step – aromatic vegetables create the base flavor!
- Cook the vegetables (8 minutes): Add carrots and celery to the pot. Cook for 5-6 minutes until slightly softened. If using mushrooms, add them now and cook until they release moisture. Texture tip: Vegetables should be tender-crisp, not mushy – they’ll cook more in the oven.
- Make the roux (3 minutes): Sprinkle flour over the vegetables and stir well to coat everything. Cook for 2-3 minutes, stirring constantly, until flour is lightly golden. Critical step: Cooking the flour prevents a raw taste and ensures smooth sauce!
- Add liquids gradually (5 minutes): Slowly pour in chicken broth while whisking constantly to prevent lumps. Add milk or cream, continuing to whisk. Bring to a simmer and cook for 3-4 minutes until thickened. Smooth sauce secret: Add liquid slowly and whisk constantly for silky, lump-free gravy!
- Season and combine (3 minutes): Stir in thyme, sage, rosemary, salt, pepper, and nutmeg. Add cooked chicken, peas, and corn. Stir well and taste, adjusting seasonings as needed. Seasoning tip: Season generously – the crust is mild, so the filling needs good flavor!
- Cool the filling (10-15 minutes): Remove from heat and let cool for 10-15 minutes while you prepare the crust. Temperature control: Hot filling can make bottom crust soggy and melt butter in crust.
Assembling the Pie:
- Prepare the dish (2 minutes): Preheat oven to 400°F. If using homemade crust, roll out one portion to fit a 9-inch deep-dish pie pan with overhang. Press into pan and trim edges. Pan choice: Deep-dish is best for generous filling!
- Fill the pie (3 minutes): Pour cooled filling into bottom crust, spreading evenly. Don’t overfill – leave about ½ inch from the top. Filling amount: You may have extra filling – it’s better than overfilling and creating a mess!
- Top with crust (5 minutes): Roll out second crust and place over filling. Trim excess, leaving 1-inch overhang. Fold edges under and crimp decoratively to seal. Sealing technique: Press edges firmly to prevent leaking during baking.
- Vent and glaze (3 minutes): Cut 4-5 slits in the top crust to allow steam to escape. Brush entire top with egg wash for golden color. Venting is essential: Steam needs to escape or filling will bubble out!
- Bake to golden perfection (45-50 minutes): Place pie on a baking sheet (catches drips!) and bake for 45-50 minutes until crust is deep golden brown and filling is bubbling through vents. Visual cues: Crust should be golden all over, not pale. Cover edges with foil if browning too quickly.
- Rest before serving (15 minutes): Let pie rest for 15 minutes before cutting. This allows filling to set slightly for cleaner slices. Patience pays: Cutting too soon results in runny filling!
Nutritional Information (Per Serving)
- Calories: 485
- Protein: 28g
- Total Fat: 24g
- Saturated Fat: 11g
- Carbohydrates: 38g
- Dietary Fiber: 3g
- Sodium: 680mg
- Vitamin A: 45% DV
- Vitamin C: 15% DV
- Iron: 12% DV
Comfort Food Balance: This is hearty, satisfying comfort food meant to nourish and comfort. Pair with lighter sides and enjoy as the special, cozy meal it’s meant to be!
Serving Suggestions
This classic pot pie pairs beautifully with complementary sides:
Classic Dinner Pairings:
- Simple green salad with vinaigrette
- Steamed green beans with butter
- Roasted Brussels sprouts
- Cranberry sauce (adds nice tartness)
- Dinner rolls or biscuits
Lighter Accompaniments:
- Mixed greens with lemon dressing
- Roasted asparagus
- Fresh fruit salad
- Cucumber and tomato salad
- Coleslaw with light dressing
Beverage Pairings:
- Crisp white wine like Chardonnay or Sauvignon Blanc
- Light beer or cider
- Iced tea with lemon
- Sparkling water with herbs
Complete Comfort Meal:
- Start with soup (butternut squash or tomato)
- Main: Chicken pot pie
- Side: Simple salad
- Dessert: Apple pie or cobbler
Storage Tips
Refrigerator Storage: Cover cooled pie and refrigerate for up to 3 days. Reheating tip: Cover with foil and reheat at 350°F for 20-25 minutes until heated through.
Freezer Storage:
- Before baking: Assemble completely, wrap tightly, freeze up to 3 months. Bake from frozen, adding 15-20 minutes to baking time.
- After baking: Cool completely, wrap well, freeze up to 2 months. Thaw overnight in fridge before reheating.
Individual Portions: Make in ramekins or muffin tins for single-serving pot pies. Perfect for meal prep! Bake for 25-30 minutes.
Make-Ahead Strategy:
- 2 days ahead: Make filling, refrigerate
- 1 day ahead: Assemble pie, refrigerate unbaked
- Morning of: Bake fresh for dinner
- Freeze ahead: Make multiple and freeze for quick future meals
Delicious Variations
Turkey Pot Pie
- Use leftover Thanksgiving turkey instead of chicken
- Add leftover stuffing to the filling
- Include leftover gravy in the sauce
- Perfect way to use holiday leftovers
- Same great comfort food feeling
Biscuit-Topped Pot Pie
- Skip top crust and use biscuit dough instead
- Drop biscuit dough over hot filling
- Bake until biscuits are golden
- Easier and more rustic presentation
- Southern comfort food at its best
Creamy Herbed Pot Pie
- Add ¼ cup fresh herbs (parsley, dill, tarragon)
- Include splash of white wine in sauce
- Use cream instead of milk
- Add Dijon mustard for depth
- Elevated, sophisticated flavors
Vegetable Pot Pie
- Skip chicken, double the vegetables
- Add potatoes, sweet potatoes, or butternut squash
- Use vegetable broth
- Include white beans for protein
- Hearty vegetarian comfort food
Chicken and Bacon Pot Pie
- Add ½ cup cooked, crumbled bacon
- Include caramelized onions
- Use half-and-half for extra richness
- Smoky, savory upgrade
- Perfect for bacon lovers
Mini Pot Pies
- Make in individual ramekins or muffin tins
- Perfect for portion control
- Great for parties and gatherings
- Easier to serve and eat
- Adorable presentation
Professional Tips for Perfect Pot Pie
Flaky Crust Secrets:
- Keep ingredients COLD (butter, water, even flour in freezer)
- Don’t overwork dough or gluten develops (tough crust)
- Rest dough in fridge before rolling
- Brush with egg wash for golden color
- Vent top crust to prevent soggy bottom
Sauce Consistency:
- Should coat a spoon but not be thick like paste
- Will thicken slightly as it cools
- If too thick, add more broth
- If too thin, cook longer or add cornstarch slurry
- Season well – crust is bland so filling needs flavor
Preventing Soggy Bottom:
- Cool filling before adding to crust
- Don’t overfill
- Bake on lower oven rack
- Use metal or ceramic pie dish (conducts heat better)
- Pre-bake bottom crust for 5 minutes if desired
Chicken Options:
- Rotisserie chicken: Most convenient
- Poached breasts: Most tender
- Leftover roasted chicken: Most flavorful
- Dark meat: More forgiving, stays moist
- Mix white and dark meat for best texture
Final Thoughts
This Classic Chicken Pot Pie is the definition of comfort food done right – it’s warm, satisfying, and fills your home with the most incredible aromas as it bakes. Every element works together in perfect harmony: the flaky, buttery crust provides textural contrast to the creamy filling, the vegetables add color and nutrition, and the tender chicken makes it a complete, satisfying meal.
What makes this recipe truly special is how it transforms simple ingredients into something that feels like a warm hug on a plate. It’s the kind of dish that brings families together around the dinner table, that makes cold evenings feel cozy, and that creates the kind of food memories that last a lifetime. Whether you’re making it for a special Sunday dinner or just because you need some comfort, this pot pie delivers every single time.
The beauty of chicken pot pie is its versatility and make-ahead friendliness. You can prep components in advance, customize the vegetables to your preferences, and even freeze it for future comfort food emergencies. It’s a recipe that rewards you with something truly special while being forgiving enough for confident home cooks at any skill level.
Share your pot pie love! Do you have cherished memories of chicken pot pie from your childhood, or is this a recipe you’re excited to try for the first time? What vegetables do you love to include, and do you have any family secret ingredients or techniques? We’d love to hear about your pot pie adventures, creative variations, or any tips you’ve discovered for making this comfort food classic even better. Share your cozy cooking stories in the comments below!