

Christmas sugar cookies are one of those holiday treats that make a kitchen feel festive before the first batch even comes out of the oven. The dough is buttery and lightly sweet, the cookies hold their shapes beautifully when prepared properly, and the decorations can be as simple or detailed as you like.
Whether you’re making Christmas trees, stars, gingerbread people, snowflakes, or classic round cookies, a reliable sugar cookie recipe makes holiday baking much easier. The trick is getting the texture right: cookies should be tender with lightly crisp edges, not dry, hard, or overly puffy. They should also keep their cut-out shapes instead of spreading into unrecognizable blobs in the oven.
This Christmas sugar cookies recipe uses familiar pantry ingredients and a straightforward method. You’ll learn how to make the dough, chill it properly, roll and cut the cookies, bake them evenly, and decorate them with a simple royal icing. There are also helpful make-ahead tips, decorating ideas, and storage instructions so you can prepare a batch before the holiday rush.
Why You’ll Love These Christmas Sugar Cookies
-
They hold their shapes: Chilling the dough helps reduce spreading, so your Christmas trees, stars, and snowflakes keep their outlines.
-
A tender, buttery texture: The cookies have lightly crisp edges and a soft center when baked just until set.
-
Easy to decorate: Royal icing gives you a smooth surface for piping, flooding, and adding festive details.
-
Make-ahead friendly: The dough can be prepared ahead, chilled, or frozen so you can spread the work over several days.
-
Fun for the whole family: Set out different icing colors, sprinkles, and decorating tools and let everyone create their own designs.
Ingredients You’ll Need
All-purpose flour: Provides the structure. Measure by spooning flour into the measuring cup and leveling it rather than scooping directly from the bag, which can pack in too much flour.
Unsalted butter: Gives the cookies their rich flavor and tender texture. Let it soften until you can press a finger into it, but it should not be greasy or melted.
Granulated sugar: Sweetens the dough and helps create a delicate texture. Fine granulated sugar works well.
Egg: Binds the ingredients and contributes to the cookie structure. Use a large egg at room temperature for easier mixing.
Vanilla extract: Adds warmth and classic sugar-cookie flavor. Pure vanilla extract is lovely, but a good-quality vanilla flavoring also works.
Baking powder: Gives the cookies a little lift. Use the measured amount rather than adding extra, since too much can make cut-out cookies puff and lose their defined edges.
Salt: Balances the sweetness and brings out the buttery and vanilla flavors.
For the Royal Icing
-
3 cups powdered sugar, sifted
-
2 tablespoons meringue powder
-
5–6 tablespoons water, plus more as needed
-
½ teaspoon vanilla extract, optional
-
Gel food coloring, as desired
Meringue powder helps royal icing dry firm, making decorated cookies easier to stack and package. Follow the directions on your meringue powder package if its recommended proportions differ.
How to Make Christmas Sugar Cookies
Step 1: Cream the Butter and Sugar
Place the softened butter and granulated sugar in a large mixing bowl. Beat with an electric mixer on medium speed until the mixture looks pale, smooth, and creamy, usually about 2–3 minutes.
Scrape down the sides of the bowl so the ingredients mix evenly. Avoid using melted butter: it changes the dough consistency and can encourage the cookies to spread.
Step 2: Add the Egg and Vanilla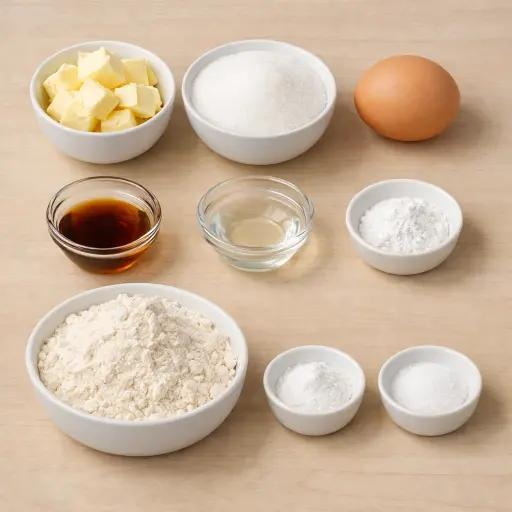
Add the egg and vanilla extract. Mix until incorporated, scraping the bowl as needed.
The mixture may look slightly uneven at first, but it should come together as you continue mixing. Avoid beating for too long once the egg is incorporated.
Step 3: Combine the Dry Ingredients
In a separate bowl, whisk together the flour, baking powder, and salt.
Add the dry ingredients to the butter mixture in batches, mixing on low speed just until a soft dough forms. Stop as soon as no large patches of dry flour remain.
Overmixing after adding the flour can develop excess gluten, which may make the cookies tougher.
Step 4: Divide and Chill the Dough
Divide the dough into two portions and shape each into a flat disc. Wrap them tightly in plastic wrap or place them in airtight containers.
Refrigerate for at least 1 hour, or until firm enough to roll without sticking excessively.
Chilling is an important step. It firms the butter, makes the dough easier to handle, and helps the cookies retain their cut-out shapes in the oven.
Step 5: Roll and Cut the Cookies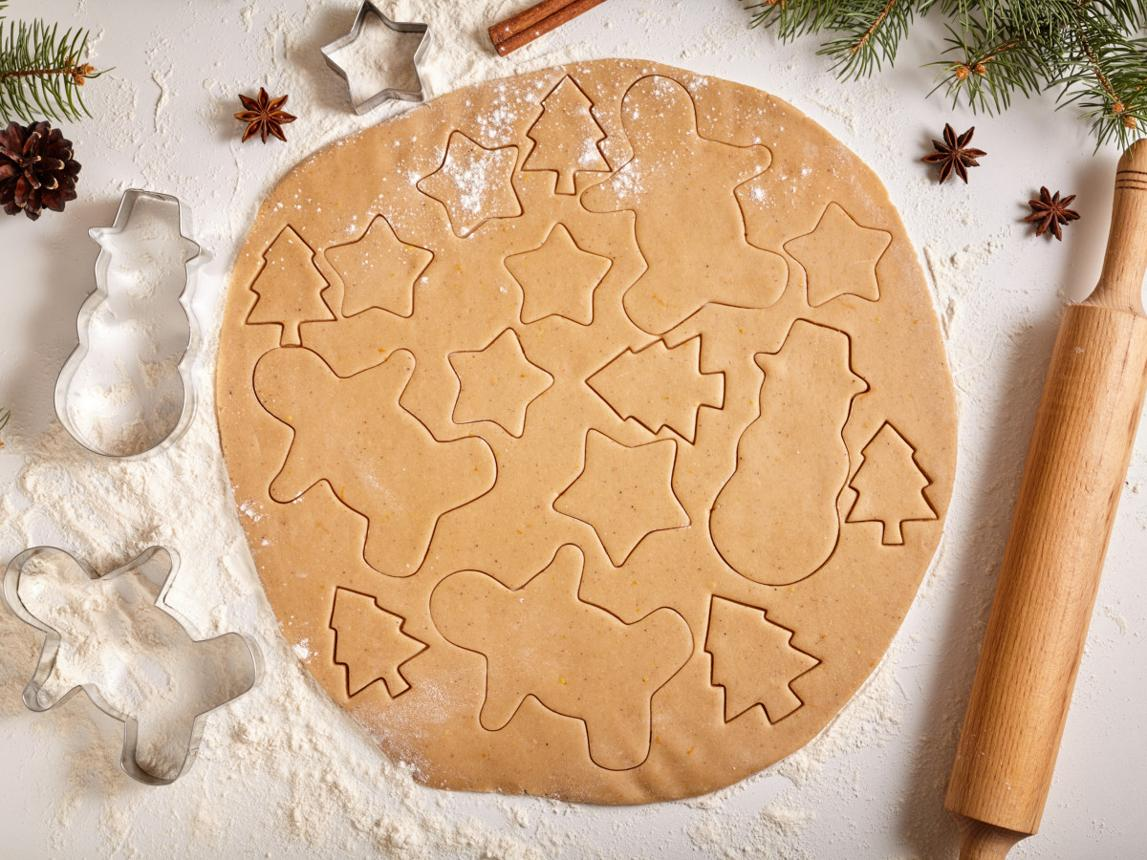
Preheat the oven to 350°F (175°C). Line baking sheets with parchment paper.
Lightly flour your work surface and rolling pin. Working with one dough portion at a time, roll the dough to approximately ¼ inch thick.
Cut out shapes using Christmas cookie cutters. Place the cookies on the prepared baking sheets, leaving about 1 inch between them.
Gather the scraps, gently bring them together, and roll again. If the dough becomes soft or sticky, refrigerate it briefly before cutting more shapes.
For sharper edges, place the cut cookies in the refrigerator for about 10–15 minutes before baking.
Step 6: Bake Until the Edges Are Set
Bake for approximately 8–11 minutes, depending on the size and thickness of the cookies.
Look for edges that are set and just beginning to turn a very light golden color. The centers may still look pale; they will continue to firm as the cookies cool.
Do not wait for the entire surface to become deeply golden. Overbaking can make sugar cookies dry and crunchy.
Let the cookies rest on the baking sheet for about 5 minutes before transferring them to a wire rack. Allow them to cool completely before decorating.
Step 7: Prepare the Royal Icing
In a clean mixing bowl, combine the powdered sugar, meringue powder, and 5 tablespoons of water. Add vanilla if using.
Beat on low speed until the ingredients are combined, then continue mixing until the icing becomes smooth and glossy. Add more water a little at a time if it is too thick.
Divide the icing into smaller bowls and tint with gel food coloring. Red, green, white, and a little gold are classic Christmas choices.
For outlining, use thicker icing. For flooding the inside of a cookie, thin a portion with a few drops of water until it flows smoothly but does not run off the edges.
Step 8: Decorate and Let the Cookies Dry
Transfer the icing into piping bags or small squeeze bottles.
Outline each cookie first, then fill the center with thinner icing. Use a toothpick to guide the icing into corners and pop any visible air bubbles.
Add sprinkles, edible decorations, or contrasting icing details while the surface is still wet. For layered designs, allow the first layer to dry before adding another color.
Leave decorated cookies at room temperature until the icing is completely dry. Drying time depends on icing thickness, humidity, and the design.
Tips for Christmas Sugar Cookies That Keep Their Shape
Use softened, not melted, butter. Butter that is too warm can make the dough greasy and encourage spreading.
Chill the dough properly. If it becomes difficult to roll or cut, return it to the refrigerator instead of adding large amounts of extra flour.
Roll to an even thickness. Uneven cookies bake at different rates. A rolling pin with thickness guides can help.
Avoid adding too much flour while rolling. Excess flour can make the finished cookies dry. Use a light dusting on the work surface and rolling pin.
Bake similar-sized cookies together. Small stars and large Christmas trees may need different baking times. Put similarly sized shapes on the same tray.
Let cookies cool completely before icing. Warm cookies can soften the icing and cause decorations to slide or lose their definition.
Christmas Sugar Cookie Decorating Ideas
You do not need professional decorating equipment to make attractive Christmas cookies. A few simple designs can create a beautiful assortment.
-
Christmas trees: Flood with green icing and add small dots or lines in different colors for ornaments.
-
Snowflakes: Use white icing on round or snowflake-shaped cookies, finishing with silver or white sprinkles.
-
Holiday wreaths: Pipe green icing in a circle and add tiny red dots for berries.
-
Gingerbread people: Use white icing for simple faces, buttons, and outlines.
-
Classic red and white cookies: Decorate stars or circles with alternating red and white lines for a simple festive finish.
For a beginner-friendly approach, use one base icing color and add a few details after it dries. Simple designs can look just as attractive as elaborate decorations.
Common Christmas Sugar Cookie Problems and How to Fix Them
Why did my cookies spread? The butter may have been too warm, the dough may not have been chilled enough, or the baking sheet may have been warm when the next batch was placed on it. Chill the cut cookies briefly before baking and use a cool baking sheet.
Why are my cookies hard? They may have been overbaked or made with too much flour. Measure flour carefully and remove the cookies when the edges are set.
Why is my dough sticky? It may be too warm or contain too much moisture. Chill it before rolling. Use only a light dusting of flour to prevent sticking.
Why is my royal icing runny? Too much water may have been added. Mix in additional sifted powdered sugar a little at a time until the icing thickens.
Why won’t my icing dry? Thick icing, high humidity, or excessive liquid can slow drying. Use the correct consistency, avoid adding too much water, and allow enough time at room temperature.
Make-Ahead, Storage, and Freezing
Making the Dough Ahead
The dough can be prepared in advance and refrigerated, tightly wrapped. If it becomes very firm, let it sit at room temperature briefly until it is workable but still cool.
You can also freeze the dough discs in a freezer-safe bag or airtight container. Thaw in the refrigerator before rolling.
Freezing Baked Cookies
Bake the cookies and allow them to cool completely. Place undecorated cookies in an airtight freezer-safe container, separating layers with parchment paper.
For decorated cookies, allow the icing to dry completely before packing. Arrange them in a single layer when possible, or separate layers carefully with parchment paper to protect the designs.
Thaw cookies in their closed container at room temperature to reduce condensation forming directly on the icing.
Storing Decorated Cookies
Keep completely dry, decorated cookies in an airtight container in a cool, dry place. Store them away from heat and moisture, which can soften the icing.
For best quality, enjoy within about a week. Storage life can vary depending on the icing, humidity, and how the cookies are packaged.
Frequently Asked Questions
Do I have to chill Christmas sugar cookie dough?
Yes, chilling is strongly recommended for this cut-out recipe. It firms the butter, makes the dough easier to roll, and helps the cookies maintain their shapes during baking.
How thick should I roll sugar cookie dough?
About ¼ inch is a useful starting point. Thicker cookies will be softer and may need a little more baking time, while thinner cookies bake faster and can become crisp more easily.
Can I make Christmas sugar cookies without royal icing?
Absolutely. You can decorate them with buttercream, melted chocolate, colored sanding sugar, or a simple powdered sugar glaze. Keep in mind that softer frostings are less suitable for stacking and packaging.
Can I use cookie cutters with this recipe?
Yes. Christmas trees, stars, bells, snowflakes, candy canes, and gingerbread people are all suitable. Avoid extremely intricate shapes if you are new to cut-out cookies, as they can be more delicate to transfer.
How do I keep sugar cookies soft?
Avoid overbaking and store the cooled cookies in an airtight container. The centers should look set but remain pale when they come out of the oven.
Can I freeze Christmas sugar cookie dough?
Yes. Wrap the dough discs tightly and freeze in an airtight freezer-safe bag or container. Thaw in the refrigerator before rolling and cutting.
Final Thoughts
Christmas sugar cookies are a lovely addition to a holiday baking list because they combine a simple buttery dough with endless decorating possibilities. Whether you prefer neat white snowflakes, colorful Christmas trees, or a tray of cookies covered in festive sprinkles, the same dependable dough gives you a good starting point.
For easier holiday preparation, make the dough ahead, chill it well, and bake the cookies when you have time to decorate. Once the icing has dried, arrange them on a platter, package them as edible gifts, or add them to your Christmas dessert table.
The most important things are to keep the dough cool, avoid overbaking, and give the cookies enough time to cool before decorating. With those details in place, you’ll have a festive batch ready to share.
Christmas Sugar Cookies
Soft, buttery cut-out sugar cookies decorated with festive royal icing. Perfect for Christmas baking, cookie exchanges and holiday gifts.
25 minutes
1 hour
8–11 minutes
24–30 cookies
Ingredients
- 2¾ cups all-purpose flour
- 1 cup unsalted butter, softened
- 1 cup granulated sugar
- 1 large egg
- 2 teaspoons vanilla extract
- ½ teaspoon baking powder
- ½ teaspoon salt
Royal Icing
- 3 cups powdered sugar, sifted
- 2 tablespoons meringue powder
- 5–6 tablespoons water, plus more as needed
- ½ teaspoon vanilla extract (optional)
- Gel food coloring
Instructions
- Cream butter and sugar until pale and fluffy.
- Add egg and vanilla; mix until combined.
- Whisk flour, baking powder and salt separately.
- Gradually add dry ingredients and mix until a soft dough forms.
- Divide dough into two discs, wrap and chill for at least 1 hour.
- Preheat oven to 350°F (175°C). Line baking sheets with parchment paper.
- Roll dough to ¼-inch thickness and cut into Christmas shapes.
- Bake for 8–11 minutes, until edges are set.
- Cool completely before decorating.
- Prepare royal icing, add colors and decorate as desired. Allow icing to dry.
Recipe Notes
Keep the dough chilled while working. Avoid overbaking, and allow cookies to cool completely before icing. Store decorated cookies in an airtight container in a cool, dry place.
Leave a Reply