
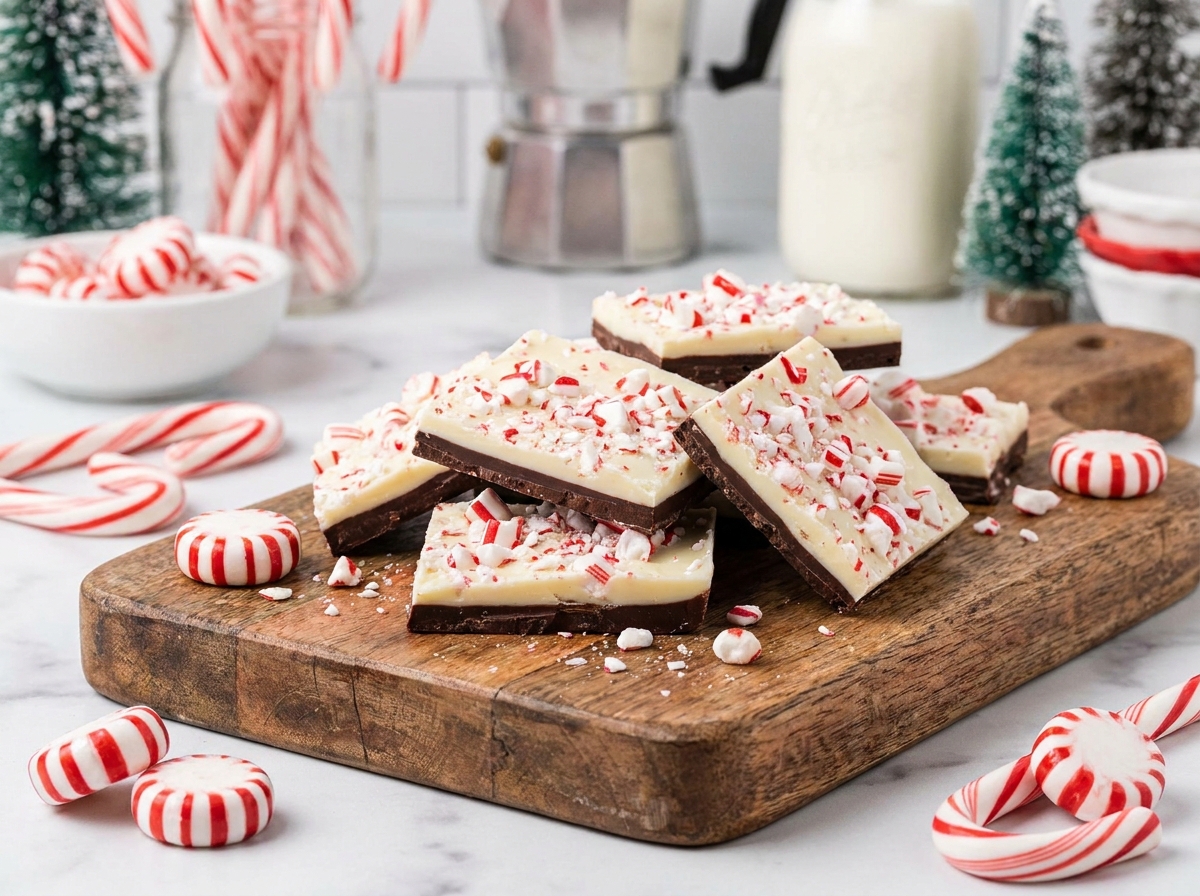
Homemade peppermint bark is one of the easiest Christmas candies to make at home. It combines a layer of rich chocolate with creamy white chocolate and crunchy pieces of peppermint candy. Once the chocolate sets, break it into rustic pieces for a festive treat that looks beautiful in a holiday tin or on a dessert platter.
The ingredient list is short, but a few small details make a big difference. Use chocolate that melts smoothly, keep moisture away from the bowl, and let the first layer set enough to support the second without becoming so cold that the layers separate. This recipe is simple enough for a beginner and easy to customize with your favorite chocolate.
Why You’ll Love This Peppermint Bark
- No oven required: The chocolate is melted gently and chilled until firm.
- Giftable: Broken pieces fit neatly into tins, jars, and treat bags.
- Only a few ingredients: Chocolate, peppermint, and candy canes create the classic combination.
- Easy to customize: Change the chocolate layers or adjust the peppermint flavor.
Ingredients You’ll Need
- 12 ounces good-quality semisweet or dark chocolate: Forms the bottom layer. Choose chocolate bars or melting wafers that are suitable for melting.
- 12 ounces good-quality white chocolate: Creates the creamy top layer. Use real white chocolate containing cocoa butter for the best flavor and texture.
- 1/2 teaspoon peppermint extract, divided: Adds mint flavor. Use a small amount because peppermint extract is concentrated.
- 3–4 standard candy canes: Crush into small pieces for the topping. Add more if you prefer a heavier peppermint crunch.
- Optional pinch of flaky salt: A small amount can balance the sweetness, especially with dark chocolate.
Choosing Chocolate That Sets Well
Chocolate quality matters because it is the main ingredient. Chocolate bars or couverture-style chocolate generally melt and taste better than some standard baking chips. White chocolate can be especially sensitive to heat, so melt it gently and stir frequently. Some white baking chips contain stabilizers and may not melt as smoothly. If you want a clean snap and glossy finish at room temperature, properly tempering the chocolate is the most reliable approach. This simpler home method can still make delicious bark, but it may soften more quickly in a warm room.
How to Make Homemade Peppermint Bark
- Prepare the pan. Line a rimmed baking sheet, approximately 9-by-13 inches, with parchment paper or a silicone baking mat. Smooth out the lining so the chocolate spreads evenly.
- Crush the candy canes. Place the candy canes in a sturdy sealed bag and gently crush them with a rolling pin. Aim for a mixture of small pieces and fine peppermint dust. Remove any very large chunks that could make the bark difficult to break.
- Melt the dark chocolate. Chop the dark chocolate into small, even pieces. Place it in a dry heatproof bowl over a saucepan of gently simmering water, making sure the bottom of the bowl does not touch the water. Stir until nearly melted, then remove from the heat and stir until smooth. Alternatively, microwave in short 15–20 second bursts, stirring between each burst.
- Add peppermint to the dark layer. Stir in about 1/4 teaspoon peppermint extract. Make sure the extract is oil-free and suitable for chocolate; water-based flavorings can cause chocolate to seize. Spread the chocolate into an even layer on the prepared pan.
- Let the first layer set slightly. Allow the dark chocolate to cool until it is no longer wet but still has a little tack. This helps the layers adhere. If it becomes completely hard and cold, the top layer may separate when the bark is broken.
- Melt the white chocolate. Use a clean, completely dry bowl. Melt the white chocolate gently using the same double-boiler method or short microwave bursts. Stir often because white chocolate can scorch easily. Remove it from the heat while a few small pieces remain and stir until smooth.
- Add the remaining peppermint. Stir in the remaining peppermint extract carefully. If the white chocolate becomes thick or grainy, it may have overheated or come into contact with moisture.
- Add the top layer. Pour the white chocolate over the dark layer. Spread gently with an offset spatula, taking care not to mix the layers together.
- Finish with candy canes. Immediately sprinkle the crushed candy canes over the white chocolate. Press the larger pieces very lightly so they adhere without sinking completely.
- Chill until firm. Refrigerate the tray for about 30–45 minutes, or until the chocolate is fully set. Avoid leaving it uncovered near foods with strong odors.
- Break into pieces. Lift the bark from the pan and break it into irregular pieces by hand. For cleaner pieces, use a sharp knife warmed briefly in hot water and wiped completely dry between cuts.
Tips for Smooth Layers That Stay Together
- Keep everything dry: Even a small amount of water or steam can cause melted chocolate to seize.
- Use gentle heat: Melt slowly and remove the bowl from heat before every piece has melted; residual heat will finish the job.
- Do not over-chill the first layer: A slightly tacky surface helps the white chocolate bond to it.
- Spread the top gently: Avoid pressing hard enough to disturb the bottom layer.
- Crush candy canes evenly: Very large chunks can make the bark difficult to cut or break.
Do You Need to Temper the Chocolate?
Tempering controls the way cocoa butter crystals form, helping chocolate set with a glossy finish and a firmer snap at room temperature. The simple melting-and-chilling method in this recipe is convenient and works well for casual homemade candy, but the bark may soften more easily or develop pale streaks called bloom if temperature changes occur. If you want a more professional finish, use a thermometer and follow a reliable tempering method appropriate for the specific chocolate you purchase. Do not assume all chocolate types use identical temperature ranges.
Storage and Make-Ahead Instructions
Store peppermint bark in an airtight container in a cool, dry place away from direct sunlight. If your kitchen is warm, refrigerate it in a sealed container. Place parchment between layers to protect the candy topping. For best flavor and texture, enjoy within about 2 weeks. If refrigerated, allow the container to come closer to room temperature before opening to reduce condensation on the chocolate.
Peppermint bark is an excellent make-ahead holiday treat. Prepare it several days before gifting, then break it into pieces and package it once fully set. Keep it away from heat during transport, especially if the chocolate has not been tempered.
Easy Variations
- Triple chocolate bark: Use a thin milk chocolate layer between dark and white chocolate. Allow each layer to become slightly tacky before adding the next.
- Dark chocolate peppermint bark: Use dark chocolate for both layers and finish with crushed candy canes.
- Extra crunchy bark: Add a small amount of finely chopped toasted almonds to the dark layer.
- Cookie-inspired bark: Sprinkle a few crushed chocolate sandwich cookie pieces over the white chocolate along with the peppermint.
- Less sweet version: Use a higher-cocoa dark chocolate and keep the white chocolate layer thinner.
Packaging Peppermint Bark for Gifts
Let the bark become completely firm before packing. Place pieces in a food-safe tin, cellophane bag, or small box lined with parchment. Separate layers with parchment paper so the candy cane topping does not scrape against the chocolate. Store the packages in a cool location and avoid placing them near a sunny window or warm appliance. A simple ribbon and label make the treat ready for a cookie exchange, neighbor gift, or holiday dessert table.
Common Mistakes to Avoid
- Overheating chocolate: High heat can make it thick, dull, or scorched. Use short bursts or gentle indirect heat.
- Using wet utensils: Water can make chocolate seize. Dry bowls, spatulas, and pans thoroughly.
- Adding too much extract: Peppermint can quickly overpower the chocolate. Measure carefully.
- Adding the top layer too late: If the bottom layer is fully cold and hard, the layers may separate.
- Storing in a warm place: Chocolate softens with heat. Keep bark cool and sealed.
Frequently Asked Questions
Can I use chocolate chips for peppermint bark?
You can, but some chocolate chips contain stabilizers that make them thicker when melted. A good-quality chocolate bar or melting chocolate usually gives a smoother result.
Why did my chocolate seize?
Chocolate often seizes when it comes into contact with water or steam, or when it is overheated. Keep the bowl and utensils dry and melt slowly.
Why are the layers separating?
The bottom layer may have become completely cold and hard before the white chocolate was added. Add the second layer when the first is set enough to support it but still slightly tacky.
Can I make peppermint bark without peppermint extract?
Yes. Use crushed peppermint candy as the main mint flavor, although the flavor will be more concentrated in the topping than throughout the chocolate.
Can peppermint bark be frozen?
It can be frozen in a tightly sealed container with parchment between layers, but condensation may affect the finish when thawed. For the best appearance, store it in a cool, dry place or refrigerate it in an airtight container.
Recipe Notes
Use good-quality chocolate, keep all equipment completely dry, and melt gently. Add the white layer while the dark chocolate is slightly tacky, then sprinkle the candy canes before the surface sets. Store airtight in a cool place.
Final Thoughts
Homemade peppermint bark is a simple Christmas candy that looks impressive with very little hands-on work. The combination of smooth chocolate, creamy white chocolate, and crunchy peppermint makes it a natural addition to holiday cookie trays and homemade gift boxes. Prepare a batch ahead of time, break it into pieces, and keep it cool until you are ready to share.
Leave a Reply