
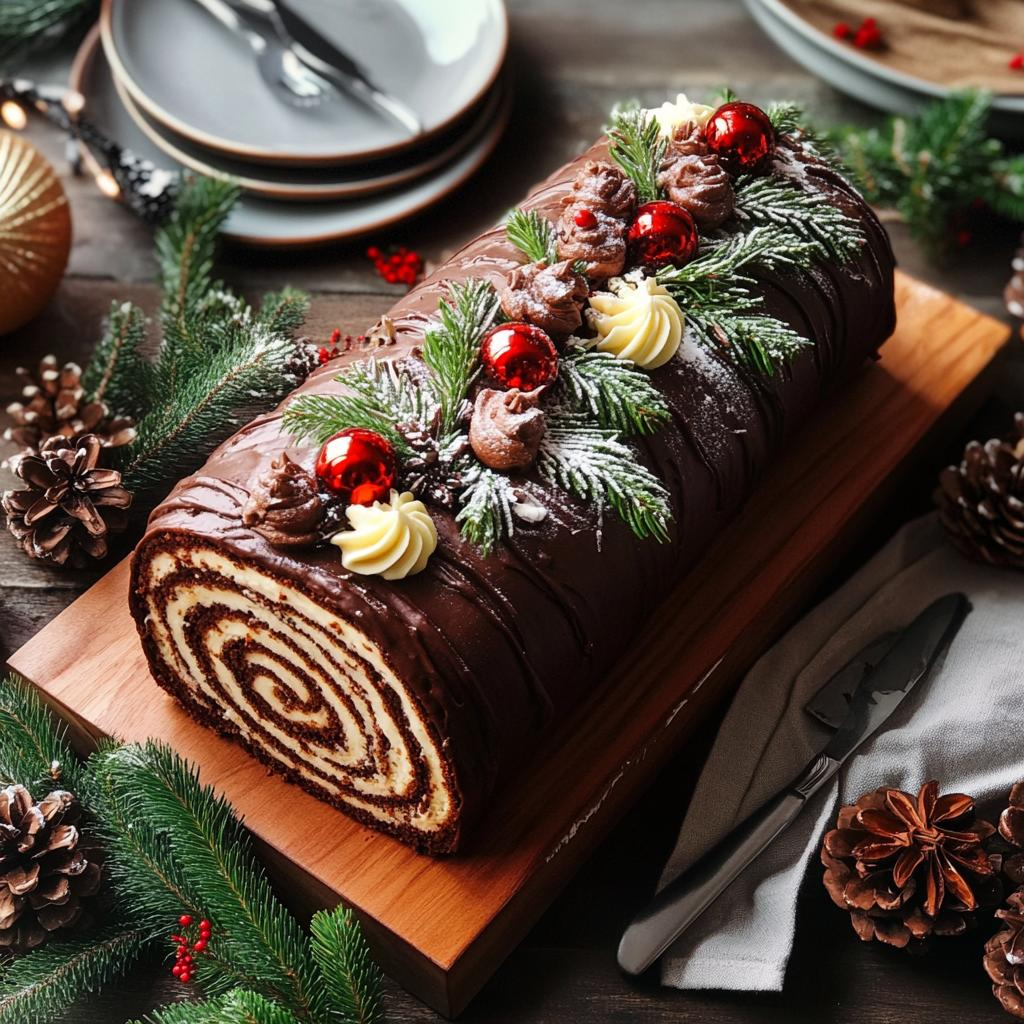
A Classic Chocolate Yule Log Cake, also known as Bûche de Noël, is a festive dessert that looks like a little woodland log but tastes like a soft chocolate Swiss roll. A thin, airy chocolate sponge is filled with lightly sweetened vanilla whipped cream, rolled into a neat spiral, and covered with chocolate frosting. A few simple fork marks create the bark effect, while a light dusting of powdered sugar gives the finished cake a snowy holiday look.
This version keeps the flavors familiar and balanced: rich cocoa, smooth cream, and a chocolate coating that is sweet without overwhelming the filling. The instructions explain how to roll the sponge while it is warm, how to avoid overmixing the batter, and how to assemble the cake even if the surface develops a small crack. You do not need elaborate pastry equipment or professional decorating skills to make an attractive Yule log at home.
Why You’ll Love This Chocolate Yule Log
- A classic holiday centerpiece: The log shape makes an ordinary chocolate cake feel special for Christmas dinner, parties, and winter celebrations.
- Contrasting textures: The sponge is light, the filling is soft and creamy, and the outside has a smooth, rich chocolate finish.
- Make-ahead friendly: You can bake and assemble the log ahead of serving, leaving only the final decorations for later.
- Simple decoration: A fork, powdered sugar, and a little chocolate are enough to create the familiar woodland look.
Ingredients You’ll Need
For the chocolate sponge
- 4 large eggs, at room temperature
- ⅔ cup (135 g) granulated sugar
- 1 teaspoon vanilla extract
- ½ cup (50 g) all-purpose flour
- ¼ cup (25 g) unsweetened natural cocoa powder
- 1 teaspoon baking powder
- ¼ teaspoon fine salt
- 2 tablespoons milk
For the vanilla cream filling
- 1 cup (240 ml) cold heavy whipping cream
- 3 tablespoons powdered sugar
- 1 teaspoon vanilla extract
For the chocolate frosting
- 6 ounces (170 g) semisweet chocolate, finely chopped
- ¾ cup (180 ml) heavy cream
- 1 tablespoon unsalted butter, optional, for extra shine
For decorating
- Powdered sugar, for dusting
- Chocolate curls, fresh rosemary, or small meringue mushrooms, optional
Ingredient Notes and Helpful Substitutions
Cocoa powder: Use unsweetened cocoa powder rather than sweetened hot chocolate mix. Cocoa gives the sponge its chocolate flavor without adding extra sugar. Dutch-process cocoa can also work, although the flavor and color may be slightly different.
Eggs: Room-temperature eggs whip more readily and help create the volume that makes this thin sponge flexible. Set them out briefly before baking, or place them in a bowl of warm—not hot—water for several minutes.
Heavy cream: Use cream suitable for whipping, ideally with at least 30% milk fat. Keep it cold until you are ready to whip it. Lower-fat cream may not hold the filling’s shape as well.
Chocolate: Semisweet chocolate creates a balanced frosting. Choose a baking bar or good-quality chocolate rather than chocolate chips if possible; some chips contain stabilizers that make ganache less fluid.
Equipment to Prepare
You will need a 10-by-15-inch jelly roll pan or a similar shallow rimmed baking sheet, parchment paper, a mixer, two mixing bowls, a fine-mesh sieve, a flexible spatula, a clean kitchen towel or another sheet of parchment, and a wire rack. A small offset spatula makes spreading the filling and frosting easier, but a regular spatula works too.
How to Make a Classic Chocolate Yule Log Cake
1. Prepare the pan and oven
Heat the oven to 350°F (175°C). Lightly grease a 10-by-15-inch jelly roll pan, line it with parchment paper, and lightly grease the parchment. Make sure the paper lies flat and reaches the corners. A thin sponge needs an even surface so it bakes at a consistent thickness.
2. Whip the eggs and sugar
In a large bowl, beat the eggs and granulated sugar on medium-high speed for about 5 minutes, or until the mixture becomes pale, thick, and noticeably increased in volume. When you lift the beaters, the mixture should fall in a ribbon that briefly rests on the surface. Beat in the vanilla. This whipped egg mixture supplies much of the sponge’s lift, so do not rush this stage.
3. Fold in the dry ingredients
Sift the flour, cocoa powder, baking powder, and salt together. Add the dry mixture in two or three portions, folding gently with a spatula after each addition. Use broad movements from the bottom of the bowl up and over the batter. Stop when no dry streaks remain. Stir the milk with a spoonful of batter in a small bowl, then fold it back in. This makes it easier to distribute the milk without deflating the whole mixture.
4. Bake the sponge
Spread the batter evenly in the prepared pan, guiding it into the corners without pressing out the air. Bake for approximately 10–12 minutes, until the top springs back lightly when touched and the center is set. Avoid overbaking: a dry sponge is more likely to crack when rolled.
5. Roll while warm
While the cake bakes, lay a clean sheet of parchment or a thin, clean kitchen towel on the counter. Dust parchment lightly with cocoa powder or powdered sugar. As soon as the cake comes out, loosen the edges and carefully invert it onto the prepared surface. Peel away the baking parchment. Starting at one short end, gently roll the warm sponge up with the clean parchment or towel inside. Place it seam-side down and leave it to cool completely. Rolling while warm helps the sponge learn its shape before it is filled.
6. Make the chocolate ganache
Place the chopped chocolate in a heatproof bowl. Warm the cream in a small saucepan until steaming and just beginning to show tiny bubbles around the edge; do not let it boil vigorously. Pour the cream over the chocolate and leave it undisturbed for 2 minutes. Stir slowly from the center outward until smooth. Stir in the butter if using. Let the ganache cool at room temperature, stirring occasionally, until it thickens to a spreadable consistency. If it becomes too firm, warm it very gently for a few seconds and stir.
7. Whip the filling
Put the cold heavy cream, powdered sugar, and vanilla in a chilled bowl. Beat on medium speed until medium peaks form. The cream should hold its shape but still look smooth. Stop before it becomes grainy or stiff. Keep the filling refrigerated while you prepare the sponge.
8. Fill and roll the cake
Carefully unroll the cooled sponge. It may curve slightly, which is normal. Spread the whipped cream over the surface in an even layer, leaving about ½ inch uncovered along one short edge. Roll the cake back up gently, using the parchment to guide it without squeezing out the filling. Place it seam-side down on a serving board or platter. Refrigerate for 20–30 minutes if the roll feels soft.
9. Frost and shape the log
Trim a thin slice from each end to reveal a clean spiral. For a branch effect, cut a short diagonal piece from one end and position it against the side of the larger log. Spread the thickened ganache over the outside, leaving the cut ends partly visible if you like. Drag a fork through the frosting in long, slightly irregular lines to suggest tree bark. Avoid making every line perfectly straight; natural variation looks more realistic.
10. Decorate and chill
Dust lightly with powdered sugar just before serving. Add chocolate curls or a small sprig of rosemary if desired. Keep the finished cake refrigerated until serving because the filling contains whipped cream.
Tips for a Sponge That Rolls Without Trouble
- Use the right pan size. A much larger pan spreads the batter too thin, while a smaller pan makes a thick sponge that is harder to roll.
- Whip the eggs until thick. The ribbon stage is important for a light sponge. Under-whipped eggs can produce a dense cake that cracks more easily.
- Fold, do not beat. Once the flour and cocoa go in, mix gently. Vigorous stirring removes the air you worked to incorporate.
- Watch the baking time. The sponge is thin and can dry out quickly. Begin checking at 10 minutes.
- Roll it warm. Waiting until the sponge is cold before its first roll makes it more likely to split.
- Do not overfill. A thick layer of cream can squeeze out when you roll the cake. Spread a thin, even layer instead.
Common Problems and How to Fix Them
The sponge cracks. Small cracks are not a disaster; the ganache will cover most of them. Larger cracks may happen if the cake was overbaked, rolled after cooling, or handled too roughly. Next time, check it early and roll it while warm. If it breaks badly, assemble the pieces into a log shape and use frosting to disguise the joins.
The filling squeezes out. This usually means the cream was too soft or the layer was too thick. Whip to medium peaks, leave a small border, and roll without pressing hard. Chill the roll before frosting if needed.
The ganache is runny. Give it more time to cool and thicken. Do not spread warm ganache over the cream-filled cake. If it becomes too firm, warm it in short bursts and stir until spreadable.
The cake sticks to the paper. Peel the lining paper away slowly while the sponge is still warm. If it resists, use a thin spatula to help release the stubborn area rather than pulling sharply.
Make-Ahead, Storage, and Freezing
You can bake the sponge a day ahead, roll it in parchment, wrap it, and refrigerate it after it has cooled. The ganache can also be prepared ahead and gently brought back to a spreadable consistency. For the best texture, fill and assemble the cake the day before serving or on the day itself.
Store the finished Yule log in an airtight cake container in the refrigerator for up to 3 days. Let slices stand at room temperature for about 10 minutes before serving so the frosting softens slightly. Because the filling is dairy-based, do not leave the cake at room temperature for extended periods.
For longer storage, freeze the uncut, assembled log before adding delicate decorations. Place it on a tray until firm, then wrap it well and freeze for up to 1 month. Thaw overnight in the refrigerator. Add powdered sugar and fresh decorations after thawing. Freezing may slightly change the texture of whipped cream, so the cake is best enjoyed fresh or within a few days.
Variations to Try
- Chocolate cream filling: Fold a little cooled melted chocolate or cocoa into the whipped cream, keeping the mixture light.
- Mocha Yule log: Add ½ teaspoon espresso powder to the sponge or ganache to deepen the chocolate flavor.
- Raspberry filling: Spread a very thin layer of seedless raspberry jam beneath the whipped cream for a bright, tart contrast.
- Orange chocolate: Add finely grated orange zest to the filling and a small amount to the ganache.
- Nutty finish: Sprinkle finely chopped toasted hazelnuts around the base of the frosted log.
Serving Suggestions
Serve chilled slices with coffee, hot chocolate, or tea. The cake is rich enough to stand on its own, but fresh raspberries or a few orange segments provide a refreshing contrast. For a holiday dessert table, arrange the Yule log on a long platter and add a little powdered sugar just before bringing it to the table.
This Classic Chocolate Yule Log Cake combines a tender chocolate sponge, a light vanilla center, and a simple bark-like finish. Give the sponge time to cool, keep the filling cold, and do not worry about small cracks: the frosting is part of the charm. With a little preparation, you can serve a beautiful Christmas dessert that feels traditional without requiring complicated decorating techniques.
Leave a Reply